DIY Polymer Clay Mushrooms
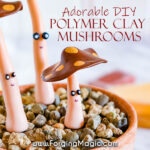
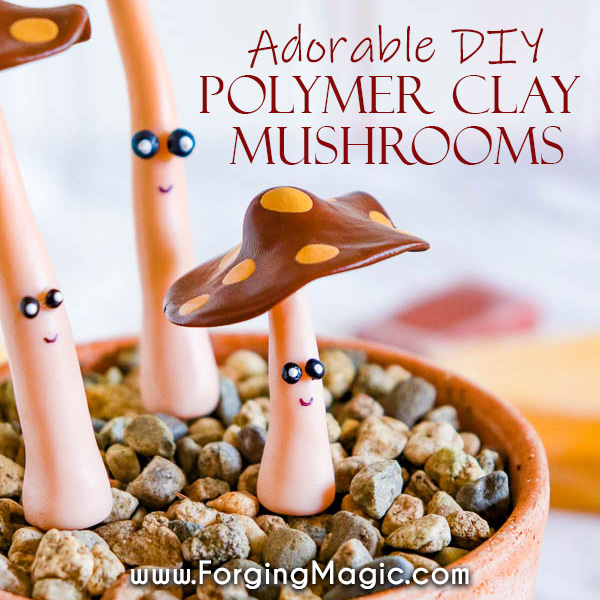
Lately I have been obsessed with mushrooms! I love these magical little creations. They are like tiny fairy homes in the forest with their big cap roofs living in little clusters like villages. There is something truly magical about mushrooms. While making some fairy gardens and looking at my windowsill plants, it occurred to me that I should make some mushrooms for my plants. So here is my DIY Polymer Clay Mushroom tutorial.
Homemade Clay Mushrooms for Pots and Fairy Gardens
Disclaimer: This article may contain commission or affiliate links. As an Amazon Associate I earn from qualifying purchases.
Mushrooms have so much character. Seriously, just take a moment and walk through a forest and look at the incredible variety of mushrooms.
In the last little bit, mushrooms have taken on an even more powerful presence in my life. My dog has been diagnosed with terminal cancer. It is heartbreaking and hard, but we are doing what we can to help her. One of the recommendations from the vet was to add Turkey Tail Mushrooms to her diet. As of right now, my dog is shiny, healthy, energetic and loving life. So I wanted to up that energy and power of the mushrooms by bringing even more mushrooms into our home.
I decided to make the mushrooms using polymer clay. Polymer clay mushrooms are extremely durable and, once cured, waterproof, making them the perfect addition to my little gardens and pots.
Polymer Clay Mushroom Supplies
Rolling pin
Parchment paper
Baking sheet
Polymer clay in a variety of mushroom colours (I used brown, tan, white and black, but next time I am totally using red for my mushroom caps!)
Clay cutting and piercing tools
You can get a polymer clay starter kit that includes lots of clay colours and the tools here.

Optional Items:
Sharpie
Glue
Paintbrush (small)
White paint
Varathane or polyurethane (water based) for sealing
How To Make Clay Mushrooms
Sculpting the mushrooms
These directions will result in mushrooms that are about 2 cm tall. Adjust as needed to make the clay mushrooms of your dreams! And that your fairies will love. Always want to keep the fairies happy!
Roll the brown clay into balls about 4cm thick. These are going to be your mushroom caps. Press and roll them into a flat circular shape.
Roll the tan clay into ½ cm balls, press onto the flat circle. These are going to be the dots on your mushroom caps.
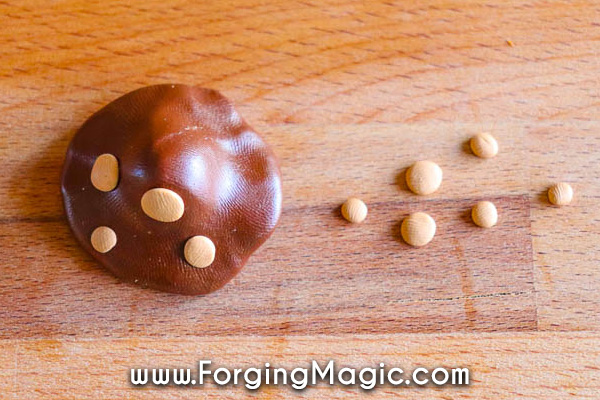
Press the small flat circles onto mushroom cap shapes using a forming tool. If you don’t have a forming tool you can do this very carefully with a chopstick to help place and press the dots into the mushroom caps.
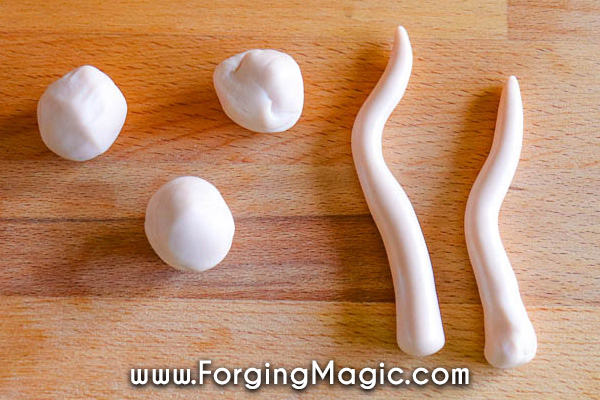
Roll the tan clay into 2-3 cm balls. Then carefully roll them out and form them into long cylindrical shapes that are tapered at the top. These are going to be your mushroom stalks. You can make your stalks thick and solid, or skinny and willowy, whatever works for you!
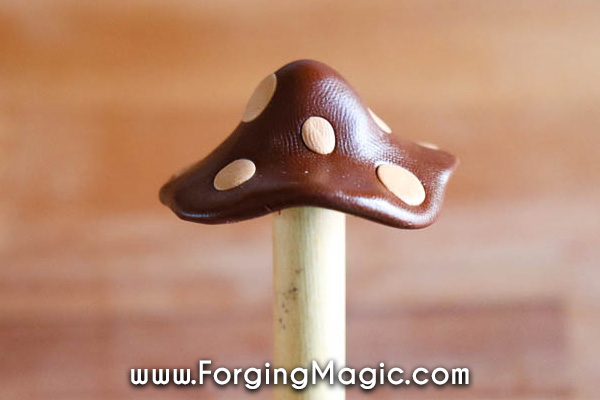
Attach the stalk to the mushroom cap. You can do this by using your forming tool to gently press the stalk into the cap to attach them. Or you can wait until all the pieces are oven cured and glue them together. Whatever is easiest for you. This is your creation!
Mushroom faces
Now this part is totally optional! If you want to add some character to your mushrooms you can give them cute little faces. There are a couple of ways you can do this.
Mushroom face 1:
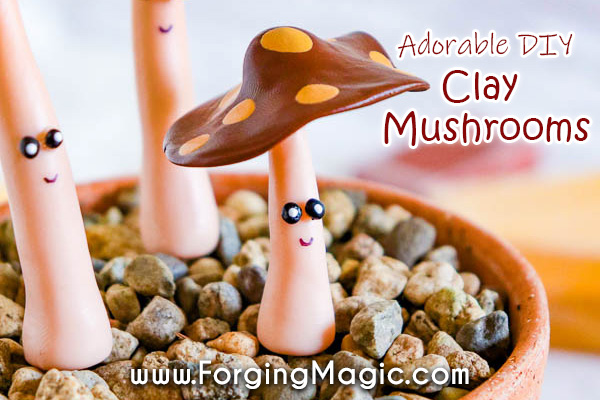
Roll tiny black balls of clay for the eyes, add a small circular piece of white clay to the centre to complete the eyes. Press into the mushroom stalk with your forming tool.
Roll another small piece of black clay into a smiling mouth. Press into place.
Bake your completed mushroom to cure it as directed on your clay packaging.
Your mushroom is finished!
Mushroom face 2:
Start by rolling tiny black balls for eyes.
Bake the clay of the eyeballs and the mushrooms as directed in the oven.
Once the clay has cooled, sketch a smile onto the stems using a fine tipped sharpie.
Glue the black balls onto it for eyes. Paint white dots onto the eyes.
Brush on a layer of polyvarathane to seal and let dry.
Your clay mushroom is finished!
Clay Mushrooms – To Seal or Not Seal
You will notice that the first approach does not call for any sealant. That is because we didn’t use any paint on that technique. Since we didn’t use any paint, there is no need to seal. polymer clay, once cured, is waterproof. It doesn’t need anything else.
In the second approach, we are using some paint and the sharpie. Overtime those features will fade if we don’t seal them in. If you don’t mind a little fading of those painted features you can skip the sealing step in approach number 2 as well.
Note: in the sun, polymer clay colours may fade.
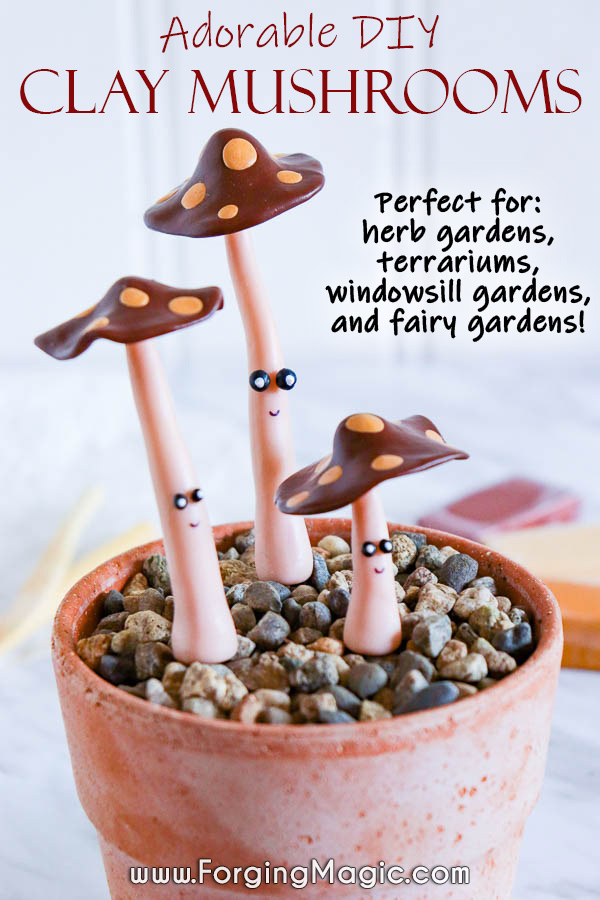
These little polymer clay mushrooms are the perfect addition to your potted plants, herbs, windowsill gardens, terrariums, and fairy gardens. Simply place them in the pot, burying the base in a bit of soil. As long as you have cured (baked in the oven), your polymer clay mushroom properly it is waterproof.
Have a great time making your own clay mushrooms and bring some mushroom magic and happiness to your home. And if you really want to explore the mystical world of mushrooms more, I HIGHLY recommend Mystical Mushrooms by Aurora Kane. Sooo beautiful and good!

More Magical DIY Projects

Polymer Clay Mushrooms DIY Project
Equipment
- Rolling Pin
- Parchment paper
- Baking sheet
- Clay sculpting tools
- Paint brush (fine) – optional
Materials
- Polymer Clay Variety of lighter and darker colours
- Sharpie optional
- White paint optional
- Glue optional
- Varathane or polyurethane (water based) optional
Instructions
- Cover your surface with parchment paper to protect the surface.
- Roll the brown clay into balls about 4cm thick. These are going to be your mushroom caps. Press and roll them into a flat circular shape.
- Roll the tan clay into ½ cm balls, press onto the flat circle. These are going to be the dots on your mushroom caps.
- Press the small flat circles onto mushroom cap shapes using a forming tool.
- Roll the tan clay into 2-3 cm balls. Then carefully roll them out and form them into long cylindrical shapes that are tapered at the top. These are going to be your mushroom stalks.
- Attach the stalk to the mushroom cap. You can do this by using your forming tool to gently press the stalk into the cap to attach them. Or you can wait until all the pieces are oven cured and glue them together.
Optional Faces
- Type 1 – Roll tiny black balls of clay for the eyes, add a small circular piece of white clay to the centre to complete the eyes. Press into the mushroom stalk with your forming tool. Roll another small piece of black clay into a smiling mouth. Press into place. Place your creations on the baking sheet. Bake your completed mushroom to cure it as directed on your clay packaging. Your mushroom is finished!
- Type 2 – Start by rolling tiny black balls for eyes. Bake the clay of the eyeballs and the mushrooms as directed in the oven. Once the clay has cooled, sketch a smile onto the stems using a fine tipped sharpie. Glue the black balls onto it for eyes. Paint white dots onto the eyes. Brush on a layer of polyvarathane to seal and let dry. Your clay mushroom is finished!

